Saturday, February 28, 2009

Houston Zoo #5

Another shot from the Houston Zoo field trip last weekend. This is Miles, the zoo's new baby giraffe (just a couple of weeks old at this time I believe).

Title: "Miles"


Camera / Lens: Canon 40D / Canon 100-400mm L zoom

Friday, February 27, 2009

Houston Zoo #4

Here's my shot of Jonathan, the Houston Zoo's male African Lion.

Title: "King Jonathan"


Camera / Lens: Canon 40D / Canon 100/400mm L zoom

Thursday, February 26, 2009

Houston Zoo #3

Another shot from the Bay Area Photo Club field trip to the zoo this past Saturday.

Title: "My Little Friend"


Camera / Lens: Canon 40D / Canon 100-400mm L zoom
Post-processing: Photoshop CS3 > Duplicate Background Layer > Topaz Adjust plugin "Clarity" preset for improved sharpness > Duplicate Layer > Cloning to remove a few small high contrast distractors > Curves Adjustment Layer for improved contrast > Merge Visible to New Layer > Nik Viveza plugin to increase local brightness in the eyes > Add New Layer in Multiply blending mode and paint a custom vignette with black brush

Wednesday, February 25, 2009

Houston Zoo #2

Another shot taken on the Bay Area Photo Club's outing to the Houston Zoo this past Saturday.

Title: "You Talking to Me?"


Camera / Lens: Canon 40D / Canon 17-55mm f/2.8 zoom
Post-processing: Photoshop CS3 > Duplicate Background Layer > High Pass Sharpening in Hard Light blending mode > Merge Visible to New Layer in Multiply blending mode to increase contrast with layer mask to protect the eyes > Merge Visible to New Layer > Duplicate Layer > Blur Lens Blur to soften the image with mask to protect the face > Add New Layer and paint with black in multiply blending mode for custom vignette and to tone down some high contrast distractions

Tuesday, February 24, 2009

Houston Zoo #1

The Bay Area Photo Club made a field trip to the Houston Zoo this past Saturday. I took a few acceptable animal photos but I think my favorite shot of the day may be this shot of a little girl in front of one of the zoo's water fountains.

Title: "Zoo Fountain Girl"


Camera / Lens: Canon 40D / Canon 100-400 L zoom
Post-processing: Photoshop CS3 > Duplicate Background Layer > Topaz Adjust plugin "Spicify" preset + custom Detail and Noise Reduction adjsutments in Luminosity blending mode > Merge Visible to New Layer > Distort Lens Correction Vignette

Monday, February 23, 2009

Bucees

When we travel we look forward to stops at one of the freeway "super stops"! We were at this one weekend before last. It is called Bucees and is located on the freeway at the Luling exit. Here it's no problem to find everything from sunglasses (foreground) to pulled pork sandwiches (background).

Title: "Bucees"


Camera / Lens: Canon 40D / Canon 17-55mm f/2.8 zoom
Post-processing: Photoshop CS3 > Duplicate Background Layer > Topaz Adjust plugin "Spicify" preset > Brightness / Contrast Adjustment Layer to improve overall brightness > Black and White Adjustment Layer @ 10% Opacity to tone down the colors a little > Topaz Adjust plugin "Clarity" preset to sharpen the image > Merge Visible to New Layer > Distort Lens Correction Vignette

Sunday, February 22, 2009

My 250

I just significantly increased the size of my carbon footprint! Should I feel guilty?

Title: "My 250"


Camera / Lens: Canon XTI / Canon 17-85mm zoom
Post-processing: Photoshop CS3 > Duplicate Background Layer > Topaz Adjust plugin "Psychedelic" preset > Curves Adjustment Layer to improve overall contrast > Brightness / Contrast Adjustment Layer to brighten the layer with layer mask to limit the effect to the truck

Saturday, February 21, 2009

Decisions, decisions!

Taken outside of Trattoria Lisina Restaurant, Driftwood, Texas this past weekend.

Title: "Decisions, decisions!"


Camera / Lens: Canon 40D / Canon 17-55mm f/2.8 zoom
Post-processing: Photoshop CS3 > Duplicate Background Layer > Topaz Adjust plugin "Spicify" preset > Nik Software Viveza plugin to increase the brightness on the Winery side of the signpost to match the light on the Restaurant side > Duplicate Layer > High Pass Sharpening in Hard Light blending mode > Curves Adjustment Layer to improve overall contrast > Brightness / Contrast Adjustment Layer to improve overall brightness > Merge Visible to New Layer > Virtual Photographer plugin "Sepia" preset > Duplicate layer > Distort Lens Correction Vignette > Brightness / Contrast Adjustment Layer for a second adjustment to improve overall brightness

Friday, February 20, 2009

Adrian's First Christmas

I thought I better follow-up the gloomy Caldwell County Jail series with something a little more lighthearted! Here's a shot of my nephew Adrian from this past Christmas.

Title: "Adrian's First Christmas"


Camera / Lens: Canon 40D / Canon 17-55mm f/2.8 zoom

Thursday, February 19, 2009

Caldwell County Jail #7

This is the last of the photos I'm presenting from my trip to the Caldwell County Jail, in Lockhart last August. I hope you enjoyed the series as much as I did! Thanks for all your comments!

Title: "Caldwell County Jail"


Camera / Lens: Canon 40D / Canon 17-55mm f/2.8 zoom
Post-processing: Photoshop CS3 > Duplicate Background Layer > Topaz Adjust plugin "Potrait Drama" preset > Add New Layer > Cloning from Layers Beneath to remove several power lines > Merge Visible to New Layer > Topaz Adjust plugin "Photo Pop" preset plus "DeNoise" feature to reduce noise > Black and White Adjustment Layer with "High Contrast Red Filter" preset to convert to Black and White > Levels Adjustment Layer to set black and white points > Merge Visible to New Layer > Distort Lens Correction Vignette > Duplicate Layer in Color Dodge blending mode with mask over the sky to limit the effet to the jail building for increased contrast > Merge Visible to New Layer > High Pass Sharpening > Import Texture as new layer with a mask over the jail to limit the effect to the sky (the texture is one of the jail cell walls from inside the jail)

Wednesday, February 18, 2009

Caldwell County Jail #6

From the Caldwell County Jail in Lockhart, Texas last August.

Title: "Downstairs"


Converted to Black and White using Photoshop CS3 Black and White Adjustment Layer with "Maximum Black" preset

Tuesday, February 17, 2009

Caldwell County Jail #5

From the old Caldwell County jail in Lockhart, Texas last August.

Title: "Upstairs"


Camera / Lens: Canon 40D / Canon 17/55mm f/2.8 zoom
Converted to Black and White using Photoshop CS3 Black and White Adjustment Layer with the "Maximum Black" preset

Monday, February 16, 2009

Caldwell County Jail #4

Another shot from my trip to the old Caldwell County Jail in Lockhart, Texas last August.

Title: "Cell #3"


Camera / lens: Canon 40D / Canon 17-55mm f/2.8 zoom
Conversion to Black and White was done with Photoshop CS3 Black and White Adjustment Layer with the Maximum Black preset

Sunday, February 15, 2009

Caldwell County Jail #3

Another photo from the old Caldwell County Jail in Lockhart, Texas last August.

Title: "Outer Corridor"


Camera / Lens: Canon 40D / Canon 17-55mm f/2.8 zoom
Converted to Black and White using PHotoshop CS3 > Black and White Adjustment Layer with "Maximum Black" preset

Saturday, February 14, 2009

Caldwell County Jail No. 2

Another shot from my trip to the Caldwell County Jail in Lockhart, Texas last August.

Title: "Caldwell County Jail Cell No. 2"


Camera / Lens: Canon 40D / Canon 17-55mm f/2.8 zoom
Converted to Black and White in Photoshop CS3 with a Black and White Adjustment Layer and the "Maximum Black" preset

Friday, February 13, 2009

Caldwell County Jail No. 1

Back in August of last year I took a trip to the old Caldwell County Jail in Lockhart, Texas. As I was looking back through some of my old photos today I realized I never processed the shots! I ended up with a few that I like a lot and I hope you do as well. The historical marker out front says that the jail was built in 1908 at a cost to taxpayers of $25,000.00.

Title: "Cell 1"


Camera / Lens: Canon 40D / Canon 17-55mm f/2.8 zoom
All the shots in this series were converted to black and white in Photoshop CS3 using a Black and White Adjustment Layer and the "Maximum Black" preset.

Thursday, February 12, 2009

Me!

Sorry but I'm practicing self-portraits again! I promise not to go crazy posting them (like I did with the pots) but every once in a while I feel the need to practice them in order to try and learn a little more about lighting and using my flash equipment and post-processing portraits. Please bear with me! Any suggestions for improvement would be highly appreciated!


Camera / Lens: Canon 40D / Canon 17-55mm f/2.8 zoom lens

Wednesday, February 11, 2009

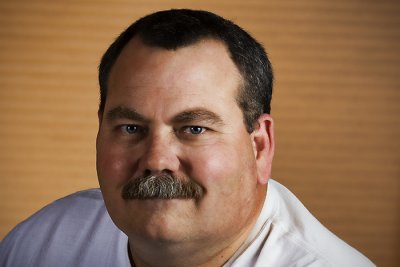
Roger Williams

We had a visit at work today from former Texas Secretary of State Roger Williams. Mr. Williams has announced that he has joined the race to replace US Senator Kay Bailey Hutchison when she vacates her Senate seat to run for Texas Governor. Mr. Williams spoke for a few minutes, took a few questions, and then headed off to his next stop on the campaign trail. I liked Mr. Williams and I agreed with a lot of his political views: The only problem is that I suspect, as with all politicians, that he was lying...because his lips were moving! :-)

Title: "Roger Williams"


Camera / Lens: Canon 40D / Canon 17-55mm f/2.8 zoom
Post-processing: Photoshop CS3 > Duplicate Background Layer > High Pass Sharpening > Curves Adjustment Layer to improve overall contrast > Merge Visible to New Layer > Topaz Adjust plugin "Simplify" preset > Duplicate Layer > Distort Lens Correction Vignette

Tuesday, February 10, 2009

HMFA Admin Building

Taken last week while I visited the Houston Museum of Fine Arts campus during my lunch hour from work. The building in the background is the administration building. The play of light and shadows caught my eye here!

Title: "Fine Art Tree"


Camera / Lens: Canon 40D / Canon 17-55mm f/2.8 zoom

Post-processing: HDR image from three handheld exposures (-2, 0, +2) using Photomatix > Photoshop CS3 > Curves Adjustment Layer to add overall contrast > Add New Layer and clone from layer below to remove a "NO Parking" sign from the middle of the scene > Merge Visible to New Layer > Distort Lens Correction adjsut Vertical Perspective to remove vertical lens distortion that had the top of the building in the background pinching in at the top > Crop to remove the blank edges created by the Lens distortion correction > Duplicate Layer > Topaz Adjust plugin "Spicify preset" > Duplicate Layer > Virtual Photographer Classic B&W preset @ 36% opacity to with mast to keep the B&W treatment from impacting the tree

Monday, February 9, 2009

What's to like?

This is one of the shots from my trip to Liberty, Texas a few weeks ago. I have to admit that this is a shot I suspect some (maybe most) folks will not appreciate. If I can't readily identify what I like about a shot I just don't think I can expect anyone else to like it...but I I can't help it ... I like it anyway. :-)

Title: "Long Shadow"


Camera / Lens: Canon 40D / Canon 17/55mm f/2.8 zoom

Sunday, February 8, 2009

Morgan's Point Gull

Here's a gull photo from last weekend. Taken at Morgan's Point in LaPorte, Texas. The pier is one of the thousands of fishing piers destroyed by Hurricane Ike last year.

Title: "Morgan's Point Gull"


Camera / Lens: Canon 40D / Canon 100-400 L zoom
Post-processing: Photoshop CS3 > Duplicate Background Layer > High Pass Sharpening > Merge Visible to New Layer > Distort Lens Correction Vignette

Friday, February 6, 2009

Maas Nursery Wrap Up

The last (for a while :-) of my shots from Maas Nursery in Seabrook, Texas.

Title: "Maas Four Green Pots"


Camera / Lens: Canon 40D / Canon 17-55mm f/2.8 zoom
Post-processing: Photomatix HDR from three handheld exposures (-2, 0, +2) > Photoshop CS3 > Curves Adjustment Layer for overall contrast enhancement > Merge Visible to New Layer > Topaz Adjust plugin "Spicify" preset > Duplicate Layer > High Pass Sharpening > Merge Visible to New Layer > Distort Lens Correction Vignette

Title: "Maas Pots in a Row"


Camera / Lens: Canon 40D / Canon 17-55mm f/2.8 zoom
Post-processing: Photomatix HDR from three handheld exposures (-2, 0, +2) > Photoshop CS3 > Curves Adjustment Layer for overall contrast enhancement > Levels Merge Visible to New Layer > Topaz Adjust plugin "Spicify" preset > Several Layers of copying and cloning to remove undesireable background elements > Merge Visible to New Layer > Add New blank layer and paint with black in Overlay Mode for custom vignette > Merge Visible to New Layer > Distort Lens Correction Vignette

Title: "Maas Pots 12"


Camera / Lens: Canon 40D / Canon 17-55mm f/2.8 zoom
Post-processing: Photomatix HDR from three handheld exposures (-2, 0, +2) > Photoshop CS3 > Curves Adjustment Layer for overall contrast enhancement > Topaz Adjust plugin "Spicify" preset > Curves Adjustment Layer #2 for overall contraxt enhancement > Merge Visible to New Layer > Distort Lens Correction Horizontal Perspective to adjust for distortion caused by my camera angle for the shot > Duplicate Layer > Distort Lens Correction Vignette

Title: "Maas Saucers"


Camera / Lens: Canon 40D / Canon 17-55mm f/2.8 zoom
Post-processing: Photomatix HDR from three handheld exposures (-2, 0, +2) > Photoshop CS3 > Curves Adjustment Layer for overall contrast enhancement > Merge Visible to New Layer > Topaz Adjust plugin "Spicify" preset > Distort Lens Correction Vignette > Brightness / Contrast Adjustment Layer to brighten the image

Thursday, February 5, 2009

Maas Nursery, Seabrook, Texas

Today and tomorrow I will finish up with my series of photos taken at Maas Nursery in Seabrook, Texas. The first two photos are different compositions of the same subject (I like them both). The last photo is a wider view of a section of the nursery that gives you a feel for what it's like to walk around this unusual nursery.

Title: "Maas Big Pot 1"


Camera / Lens: Canon 40D / Canon 17-55mm f/2.8 zoom
Post-processing: Photomatix HDR from three handheld exposures (-2, 0, +2) > Photoshop CS3 > Curves Adjustment Layer for overall contast enhancement > Levels Adjustment Layer to set a black point > Merge Visible to New Layer > Topaz Adjust plugin "Spicify" preset > Distort Lens Correction Vignette

Title: "Maas Big Pot 2"


Camera / Lens: Canon 40D / Canon 17-55mm f/2.8 zoom
Post-processing: Photomatix HDR from three handheld exposures (-2, 0, +2) > Photoshop CS3 > Curves Adjustment Layer for overall contast enhancement > Merge Visible to New Layer > Topaz Adjust plugin "Spicify" preset > Curves Adjustment Layer for another overall contast pop > Brightness / Contrast Adjustment Layer to increase overall brightness > Merge Visible to New Layer > NIK Viveza plugin to increase local brightness on the pot only > Duplicate Layer > Distort Lens Correction Vignette

Title: "Maas Pots and Plants"


Camera / Lens: Canon 40D / Canon 17-55mm f/2.8 zoom
Post-processing: Photomatix HDR from three handheld exposures (-2, 0, +2) > Photoshop CS3 > Curves Adjustment Layer for overall contrast enhancement > Merge Visible to New Layer > Topaz Adjust plugin "Spicify" preset > Duplicate Layer > Distort Lens Correction Vignette

Wednesday, February 4, 2009

Clearance

Another shot from the trip I took to Liberty, Texas a couple of weekends ago. This is the old Highway 146 bridge over the Trinity River.

Title: "Bridge Clearance"


Camera / Lens: Canon 40D / Canon 17-55mm zoom
Post-processing: Photoshop CS3 > Duplicate Background Layer > High Pass Sharpening > Merge Visible to New Layer > NIK Viveza plugin to locally brighten the sign and bridge elements > Merge Visible to New Layer > Distort Lens Correction Vignette

Tuesday, February 3, 2009

Old Liberty Bridge

Here is another shot of the old Highway 146 bridge taken on my trip to Liberty, Texas a couple of weeks ago.

Title: "Old Liberty Bridge 2"


Camera / Lens: Canon 40D / Canon 17-55mm f/2.8 zoom
Post-processing: Photoshop CS3 > Duplicate Background Layer > Topaz Adjust plugin "Dramatic" preset + custom DeNoise to reduce noise > NIK Viveza plugin to locally increase brightness of the bridge > Duplicate Layer > Topaz Adjust plugin "Color Blast" with mask to block the effect to all but the warmer tones > Merge Visible to New Layer > Distort Lens Correction Vignette

Monday, February 2, 2009

Maas Greenhouse

Even though our winters in Houston are mild (OK, very mild!) some plants still require a little tender loving care to survive through the season. For plants at Maas Nursery in Seabrook that TLC is found in the temperature controlled greenhouse.

Title: "Maas Greenhouse"


Camera / Lens: Canon 40D / Canon 17-55mm f/2.8 zoom
Post-processing: Photomatix HDR from three handheld exposures (-2, 0, +2) > Photoshop CS3 > Curves Adjustment Layer for overall contrast enhancement > Merge Visible to New Layer > Topaz Adjust plugin "Spicify" preset > Duplicate Layer > High Pass Sharpening > Curves Adjustment Layer #2 for overall contrast enhancement > Black and White Adjustment Level to convert to B&W at 41% opacity with a mask to limit the effect to the left and top of image > Merge Visible to New Layer > Distort Lens Correction Vignette

Sunday, February 1, 2009

A Quiet Place to Rest

Another photo from my trip to Maas Nursery last weekend. This one is of a quiet resting place located on the Nursery grounds.

Title: "Maas Resting Place"


Camera / Lens: Canon 40D / Canon 17-55mm f/2.8 zoom
Post-processing: Photoshop CS3 > Duplicate Background Layer > Cloning to remove some foreground clutter > Duplicate Layer > Topaz Adjust plugin "Clarity" preset to some light sharpening > Curves Adjustment Layer to improve overall contrast > Merge Visible to New Layer > Transform - stretch the top to eliminate a small strip of sky > Merge Visible to New Layer > Virtual Photographer plugin "Sepia" preset > Curves Adjustment Layer to improve overall contrast > Cloning to remove additional foreground elements to further simplify the foreground > Duplicate Layer > NIK Viveza plugin to adjust brightness on the left hand side of the photo just a tad to balance it better with the right hand side > Duplicate Layer > Distort Lens Correction Vignette