Thursday, November 20, 2008

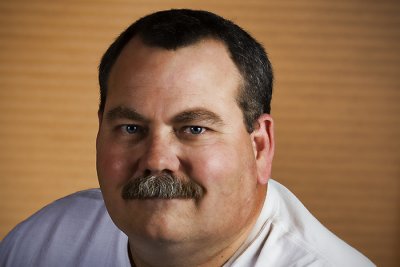
The Monk

Another character from this past weekend's outing to the Texas Renaissance Festival.

Title: "The Monk"


Camera / Lens: Canon 40D / Canon 17-55mm f/2.8 zoom
Post-processing: Photoshop CS3 > High Pass Sharpening > Merge Visible to New Layer > Topaz Adjust “Spicify” > Merge Visible to New Layer > Virtual Photographer "Character" # 50% Opacity > Merge Visible to New Layer > I cloned some foliage from a portion of the photo I ultimately cropped away to cover a tree truck in the middle of the background (and the subject's head)

I couldn't decide if I liked the color or B&W version better so here is the B&W version for your consideration as well (same processing as the color version with the addition of a B&W Adjustment Layer in Photoshop CS3).

Title: "B&W Monk"

Wednesday, November 19, 2008

The Sheriff

Here is my photographic interpretation of the Sheriff of Nottingham taken this past weekend at the Texas Renaissance Festival!

Title: "The Sheriff"


Camera / Lens: Canon 40D / Canon 17-55mm f/2.8 zoom
Post-processing: Photoshop CS3 > Duplicate Background > > Topaz Adjust Plugin “Simplify” @ 89% opacity > Curves Adjustment layer for improved contrast > Merge Visible to New Layer > Red Paw Media Bleach Bypass plugin @ 34% opacity > Merge Visible to New Layer > Cloning to remove high contrast distractions in the background and a button on subject jacket

Tuesday, November 18, 2008

Amazing Maze

This maze is located at the Texas Renaissance Festival. I photographed this maze this past Sunday from a platform located in the middle of it. It took me about 15 minutes of walking to find the platform so I have to say it is a pretty good maze in addition to being colorful! LOL

Title: "Amazing Maze"


Camera / Lens: Canon 40D / Canon 17-55mm f/2.8 zoom
Post-processing: Photoshop CS3 > Topaz Adjust “Vibrance” > Curves Adjustment layer to improve contrast > Merge Visible to New Layer > Crop and Free Transform Skew to imphasize the maze and de-emphasize the background > Merge Visible to New Layer > Brightness and Contrast Adjustment Layer to brighten up the image > Merge Visible to New Layer > Distort Lens Correction Vignette